

This is one of the most unusual summers ever. There just is no other way to look at things, other than different and certainly unusual. And with this crazy summer, the question has been asked, ‘who do you miss the most over the summer’? For me, the answer is simply, family. I miss summer vacation where you get to see your family that is normally just too far away. I miss my nieces and nephews, and their parents of course. So today I am crafting a couple of cards to send some fairy kisses and foggy hellos to those I miss most.
Background

Step One: Using some blending inks, create a background onto some 90lb Soft Finish Cardstock. I put the darkest color in the middle on a diagonal, and blended the lighter colors out towards two opposite corners. I used Candied Apple, Spiced Marmalade and Mustard Seed Distress Inks with a blending brush.

Step Two: Die cut both the ink blended cardstock and a piece of trimmed 90lb Soft Finish Cardstock using the new Floral Burst Background die. I saved all the pieces of the die cut colored cardstock to add back into the plain die cut piece.
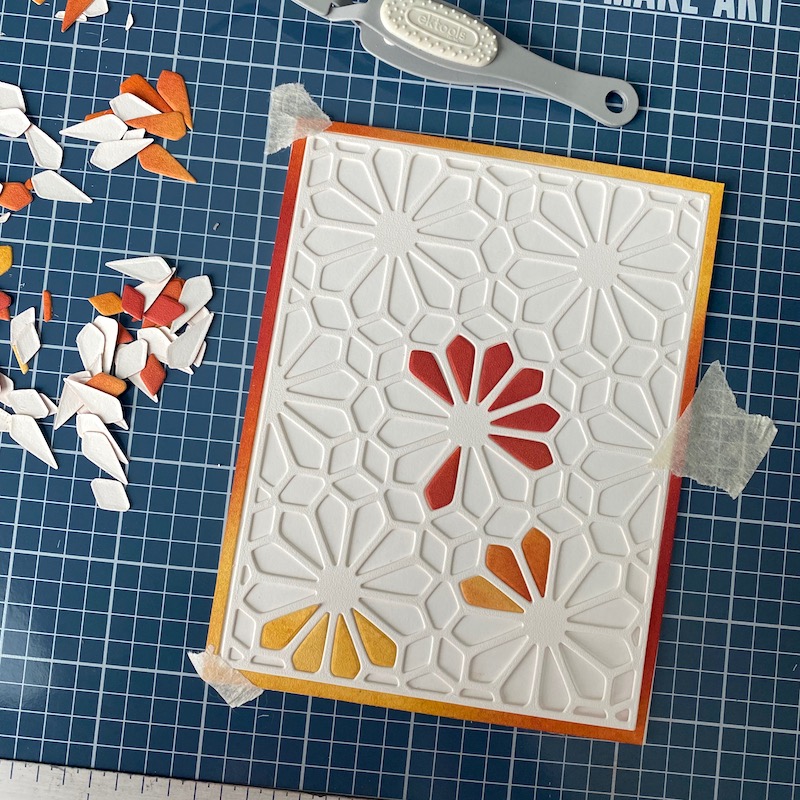
Step Three: Adhere the ink blended rectangle to an A2 card frame. Initially, I planned to remove the white die cut piece once I added the floral pieces back into position, so I simply taped the white die cut piece into place. Then adhere the die cut pieces into place. Yes, this is tedious and time consuming, but it is so worth it if you have the patience.

Step Four: I had planned to just leave my card like this, so I wanted to show you what the adhere die cut pieces looked like without the die cut white background. However, this was not quite the look I was going for, so using Kids Choice Glue, I adhered the white die cut frame back into place.

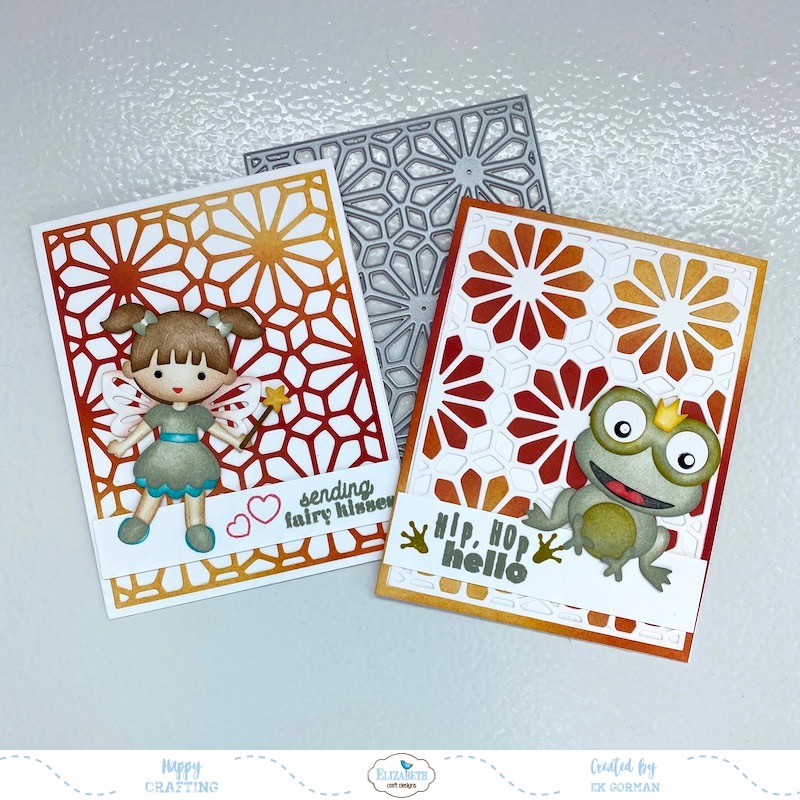
Step Five: Adhere the ink blended die cut onto an A2 card frame. This will give you two cards with gorgeous backgrounds. You could simply add a sentiment banner and call these cards done, but I wanted to add a stronger focal image to both cards.
Focal Image
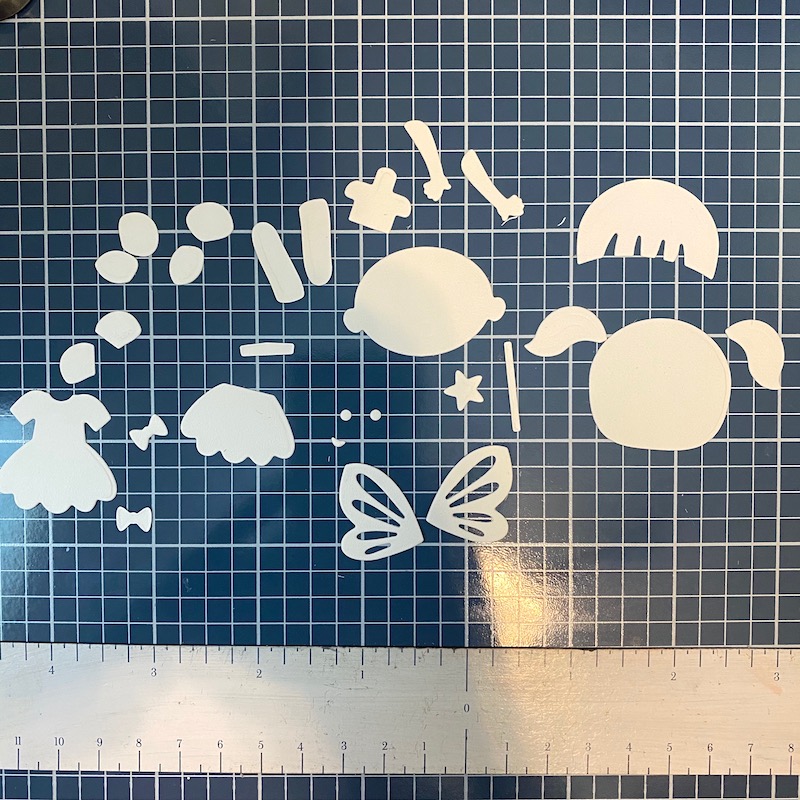
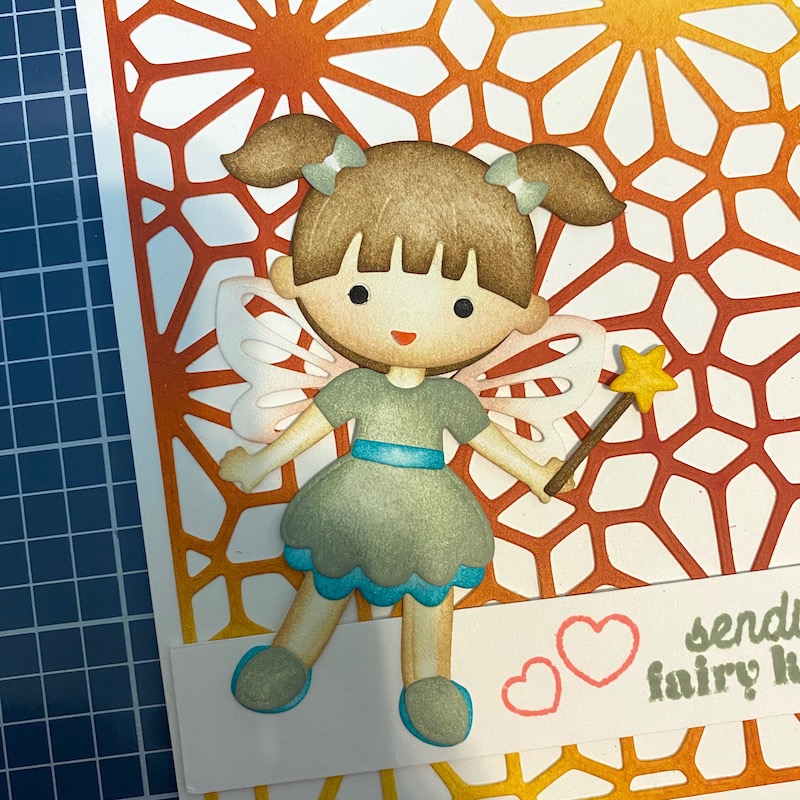
Step Six: For the first focal image, die cut the new Fairy 1 die set using 90lb Soft Finish Cardstock.

Step Seven: Add color to the die cut pieces using a blending ink and blending sponges. I used Bundled Sage, Peacock Feather, Brushed Corduroy, Antique Linen, Tea Rose, Mustard Seed, Worn Lipstick and Black Soot Distress Inks to color all these pieces.

Step Eight: Using Kids Choice Glue, assembled the Fairy.
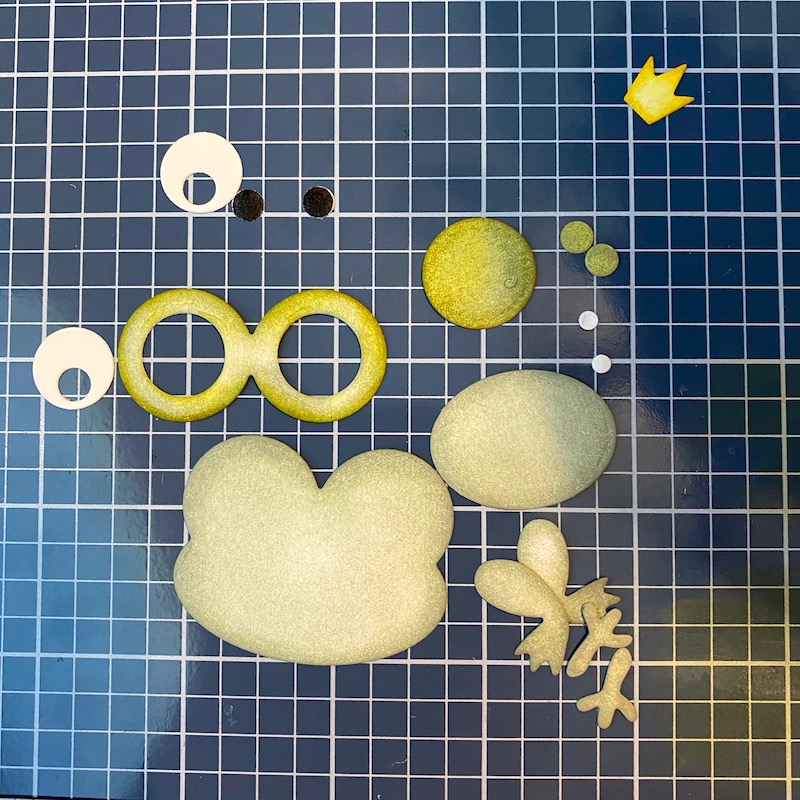
Step Nine: For the second card, die cut the pieces of the new Frog die set out of 90lb Soft Finish Cardstock. Using a blended ink, color the die cut pieces. I used Bundled Sage, Crushed Olive, Mustard Seed, Candied Apple, and Black Soot to color the pieces.

Step Ten: Using Kids Choice Glue, assemble the Frog.
Sentiments
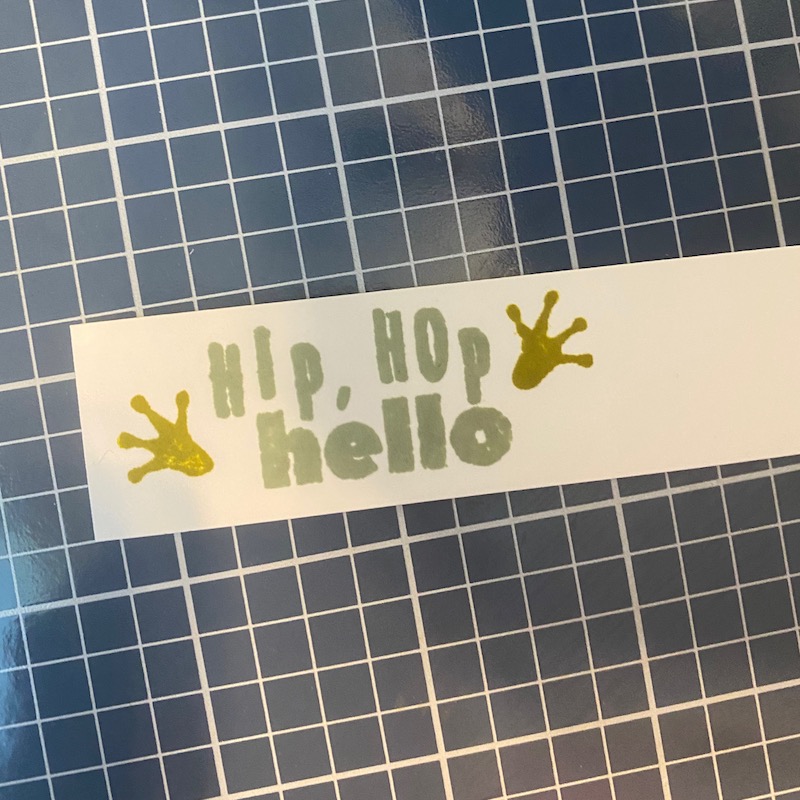
Step Eleven: Create sentiments for the two cards, but stamping the sentiments onto a piece of trimmed 90lb Soft Finish Cardstock. For the Frog Card I used the new Prince & Frog Sentiments stamp set.
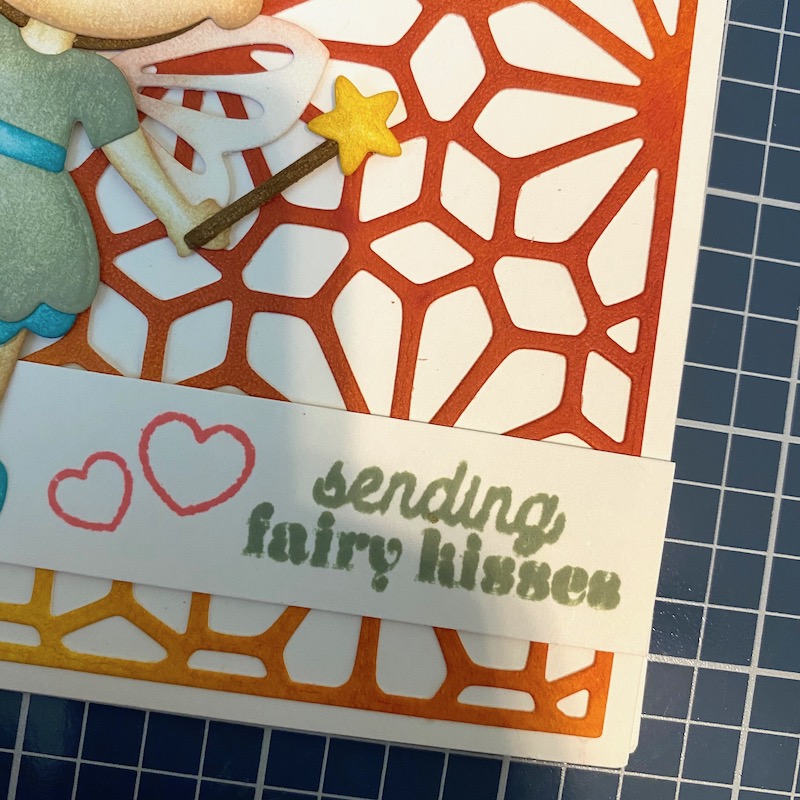
Step Twelve: For the Fairy card sentiment, I used the new Once Upon a Time Sentiments stamp set.
Assembling the Card
Step Thirteen: Finish the cards by adhere the sentiment strips and assembled die cuts to the card frames using 10mm Clear Double Sided Adhesive.

Here is the finished card featuring the blended Floral Burst Background die set and Fairy 1 die set. This card will be sent to one of my nieces just to say hello since we were not able to hug this summer.
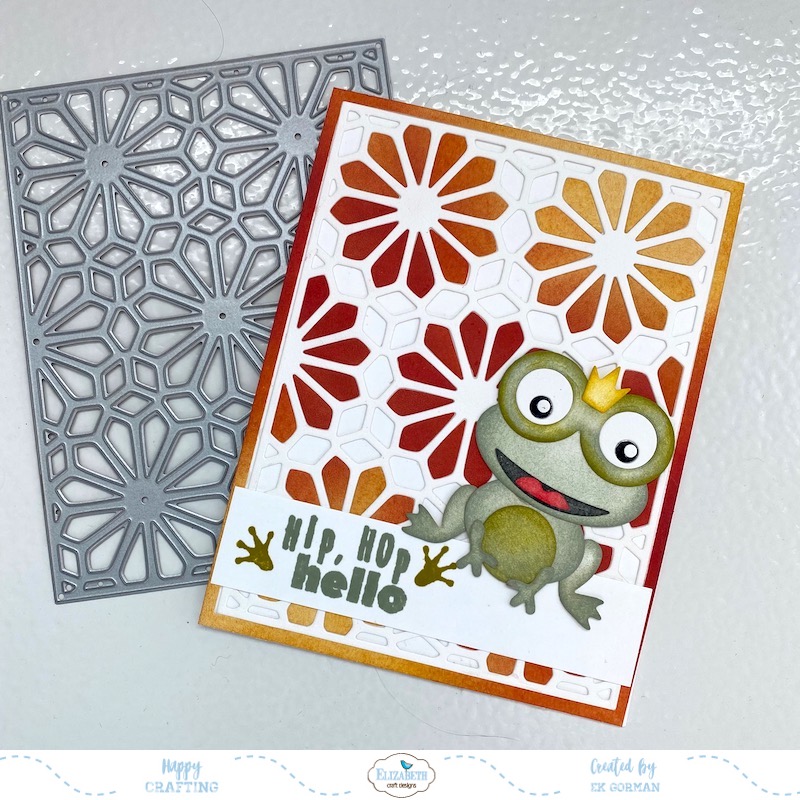
Here is the finished card featuring the inset die cut pieces into the Floral Burst Background die set and the Frog die set. This sweet little card will be sent to my young nephew, who never likes hugs, but always likes cards.
Thanks for hoping in today, and checking out my missed summer kisses cards. I hope this summer is finding you not missing too many people you love. Remember, just because you can’t see someone doesn’t mean they wouldn’t love to see a card from you. Let me know in the comments below who you are missing the most and don’t forget to pop over to Elizabeth Craft Designs Blog to see all the summer miss you projects. Until then, happy crafting.


Love this card
LikeLike