
 I am sneaking in today to share something a little different for me. I wanted to play around with Krista Schneider’s new Snowflake stamp set. However, I didn’t just want to stamp out these gorgeous snowflakes, but wanted to play around and try something a little different. So today, I played around with some Nuvo Mousse to see if I could create some fun magical winter snow.
 Step One: Trim some ECD Watercolor paper to 4x 4.5. Then pull out a collection of winter colors. I used Lilac Lavender, Powder Blue, Cornflower Blue, and Old Navy.
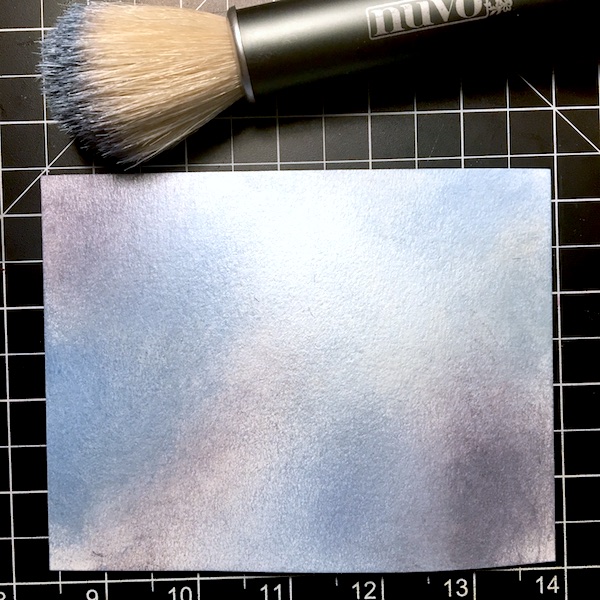 Step Two: Layer the lightest color onto the watercolor paper. Then blend in the rest of the colors using the darkest to the lightest. Let Dry.
 Step Three: Add one of the large snowflakes to an acrylic block, and then using a watercolor brush, paint the lightest color onto the stamp.
 Step Four: Stamp the snowflake onto the paper. Repeat several more times. Let dry.
 Step Five: Repeat step three and four with the darkest color and a smaller snowflake stamp.
 Step Six: Repeat step three and four with a mid-grad color and a new snowflake stamp.
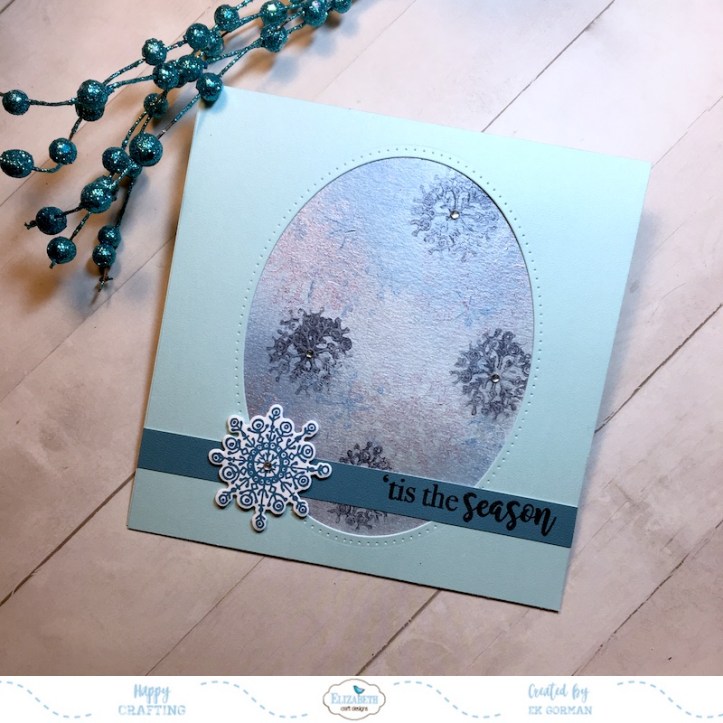
 Step Seven. Trim a piece of Soft Sky Soft Finish Cardstock to 12×6 inches and score and fold at 6 inches.
Step Eight: Trim a second piece of Soft Sky Soft Finish Cardstock to 6×6 inches and die cut with the second largest oval from the Garden Notes- Frame It/Stitched Ovals.
Step Nine: Stamp one of the snowflakes onto some white cardstock with some blue ink. I used Archival Cornflower blue ink. Die cut out the snowflake using Snowflakes die set.
Step Ten: Adhere the Nuvo panel into the die cut oval and adhere the 6×6 die cut panel to the card frame.
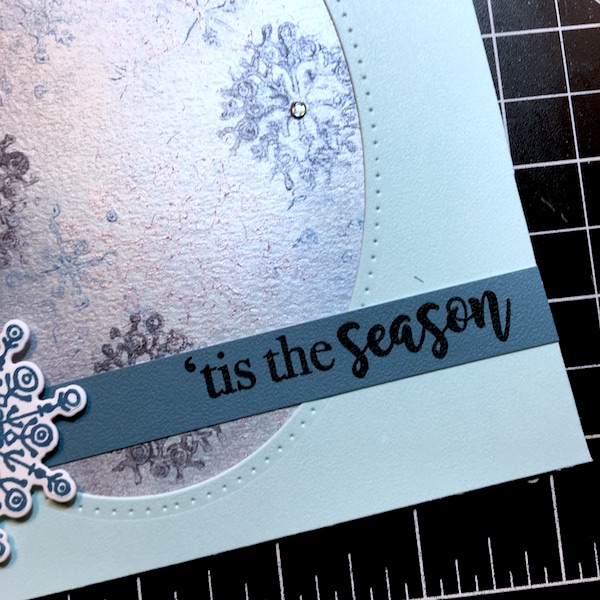 Step Eleven: Cut a banner out of Dusky Sky cardstock and adhere to the card frame. Add the die cut snowflake to the banner with 3d tape.
Step Twelve: Stamp the sentiment onto the Dusky Sky banner from the Classic Christmas Sentiments stamps.
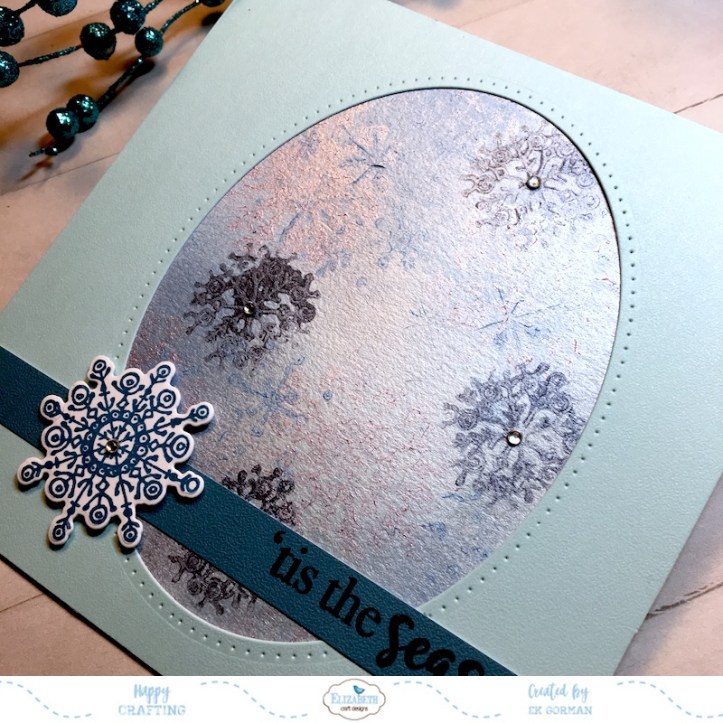 Step Thirteen: Add some adhesive crystals to the center of some of the snowflakes to add just a touch more sparkle.
 Thanks for peeking in on this different technique to create a snowy background. What do you think? Do you like the look of stamping with Nuvo Mousse?


Reblogged this on Kathy's Crafts and things and commented:
This is really neat!
LikeLike