
 The new dies are now available from the Susan’s Garden Collection over at Elizabeth Craft Designs. There are all sorts of beautiful new flowers that can be crafted into realistic looking paper flowers.
 Today I am sharing two of the new floral dies, the Eucalyptus Branch die and the Forsythia die set in this one card, as well as a pictorial tutorial on the process.
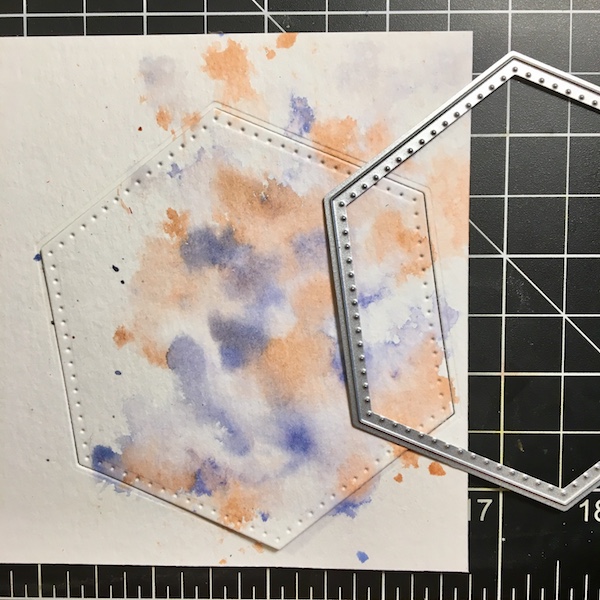 Step 1: Splatter pale orange and lilac blue watercolor onto some watercolor paper.
Step 2: Die cut the paper with a medium sized die from the new Stitched Hexagons die set.
 Step 3: Die cut the some Dusky Sky Soft Finish Cardstock with the next sized Stitched Hexagon Die.
Step 4: Adhere the watercolor paper to the Dusky Sky paper using 6mm double sided adhesive.
 Step 5: Add the hexagons to an A2 card frame made from 100lb White Soft Finish Cardstock.
 Step 6: Die cut the Fortythia flower buds out of 85lb White Soft Finish Cardstock. I die cut the buds three times.
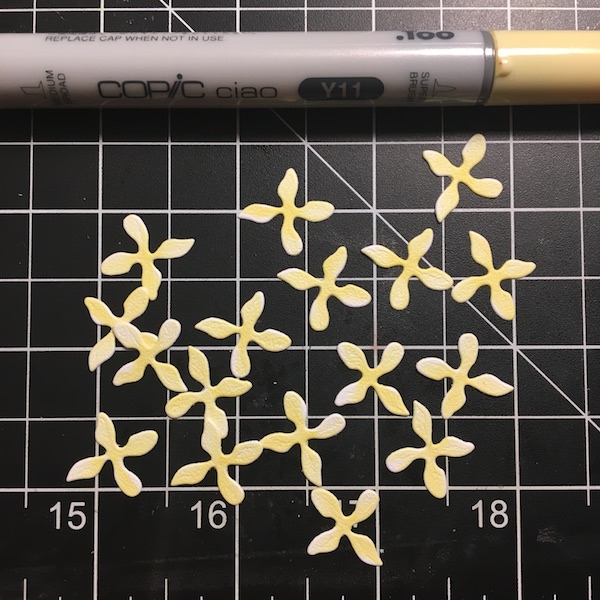 Step 7: Color the buds with a yellow alcohol marker. I used copic Y11.
 Step 8: Touch the center of the bud with a dark brown marker. I used E47.
Step 9: Color the center of the bud with a dark orange marker. I used YR07. The brown will blend out a little.
 Step 10: Blend out from the center with two yellows, coloring dark in the center and blending to the lighter color. I used Y19 and Y13.
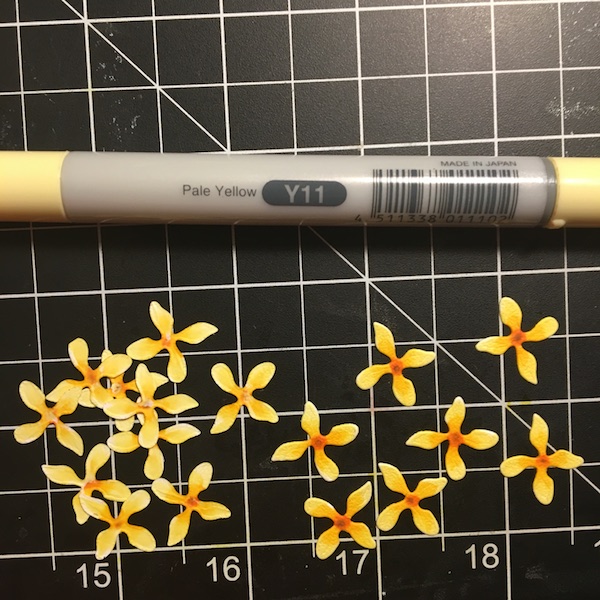 Step 11: Blend all of the bud out with the original yellow mark (Y11). Also, color the back of the bud.
 Step 12: Placing the buds face down on the Molding Pad, use the small loop tool from the all metal tool set and curl the petals inward.
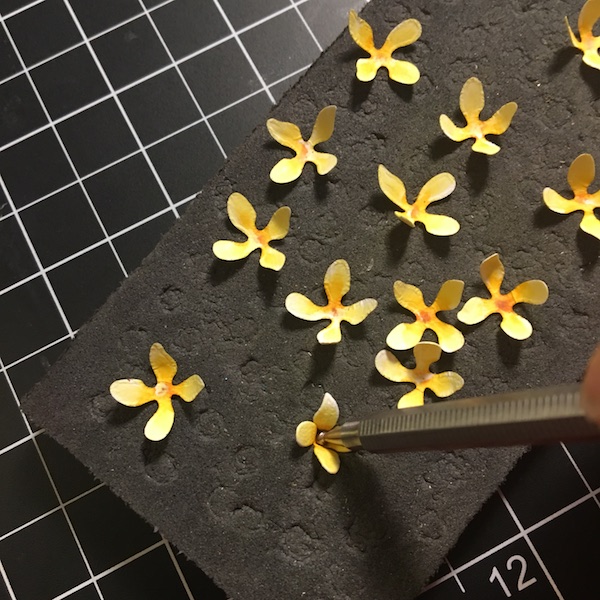 Step 13: Flip the buds over and cup the flower in the center with the small stylus.
 Step 14: Die cut the floral branches in 85lb White Soft Finish Cardstock. Color with Panpastels. I used Yellow Ochre and Burnt Sienna Shade.
 Step 15: Die cut the leaves three times out of Dusky Sky Soft Finish Cardstock.
Step 16: Using the leaf tool and the leaf pad score the center of the leaves.
 Step 17: Color the leaves with PanPastels. I used Permanent Green Shade, Bright Yellow Green Shade, and Bright Yellow Green.
Step 18: Using the small loop tool and the molding pad, curl the leaves.
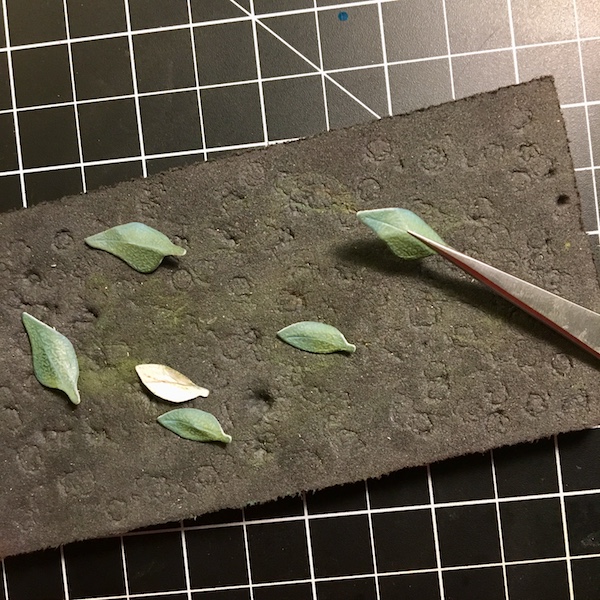 Step 19: Using the tweezers bend the leaves along the score line. Set the buds, branches and leaves to the side.
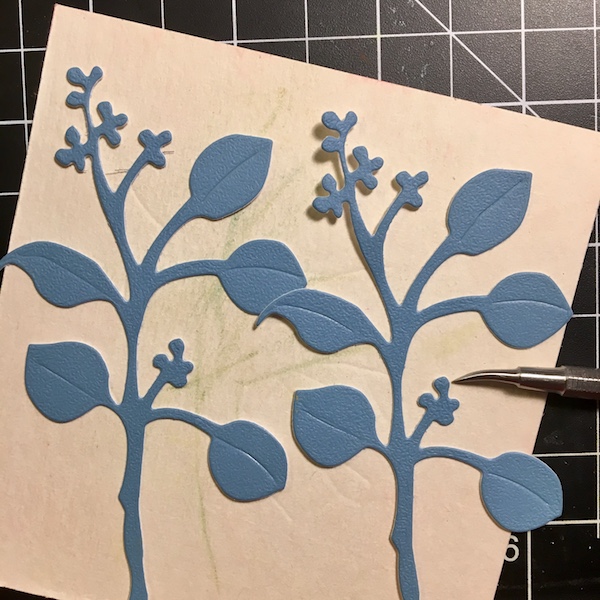 Step 20: Die cut the Eucaluptus Branch two times out of Dusky Sky Soft Finish Cardstock.
Step 21: Using the leaf pad and the leaf tool, score the leaves.
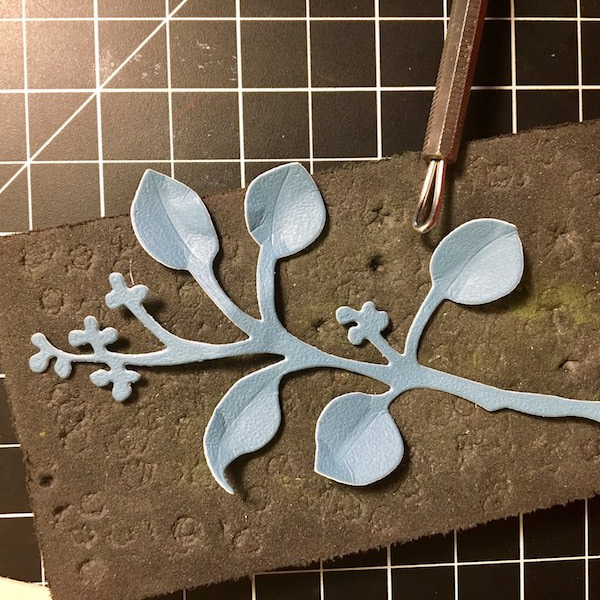 Step 22: Using the small loop tool and the molding pad, curl the leaves.
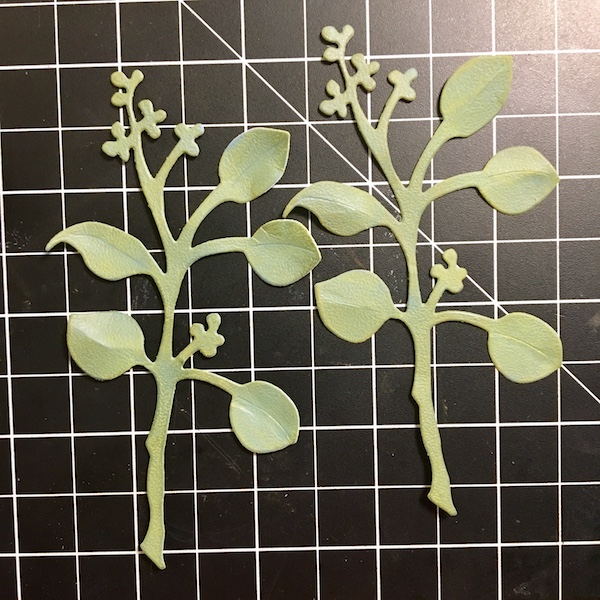 Step 23: Color the branches with PanPastels. I used Permanent Green Shade, Bright Yellow Green Shade, and Bright Yellow Green.
 Step 24: Touch the flowering bud with PanPastels. I used Yellow Ochre.
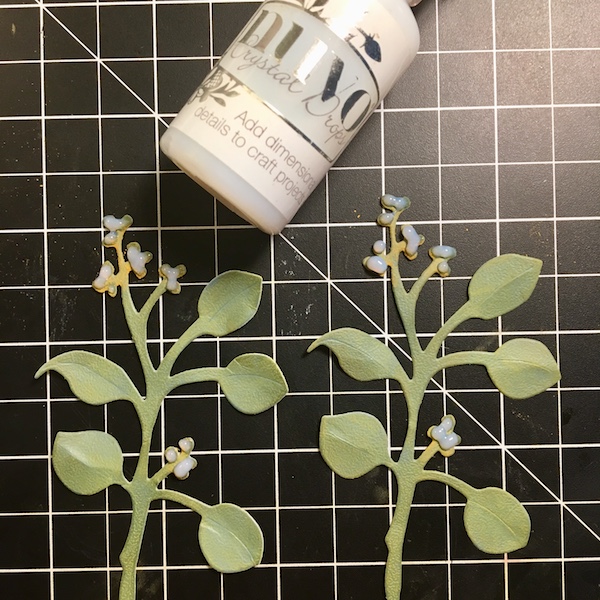 Step 25: Ad Crystal Nuvo Drops to the flowering bud. I used Morning Dew. Let Dry.
 Step 26: Using Kids Choice Glue add the Eucalyptus Branches to the card frame over the hexagons.
Step 27: Glue the Forsythia branches over the Eucalyptus branch.
 Step 28: Using tweezers and Kids Choice Glue, add the Forsythia buds to the branches.
Step 29: Using the tweezers and glue, add the Forsythia leaves under the buds.
Step 30: Stamp a sentiment from the Little Words Mean A Lot stamp set in cornflower blue ink.
 In the end, I decided to add a third Forsythia branch to the card, plus extra buds to the original two branches. The card seemed a little thin, and the addition seemed to fill the void.
 Make certain you sneak over to the ECD blog today to see all the different projects. You will not be sorry. They Design Team really created some gorgeous projects.

