
 Hey friends! Have you seen the new dies and stamps released over at Elizabeth Craft Designs? Well, today I thought I would play with another new die, the Tree die set. I thought it actually would be fun to create a sunset silhouette to create these two striking, yet simple designs.
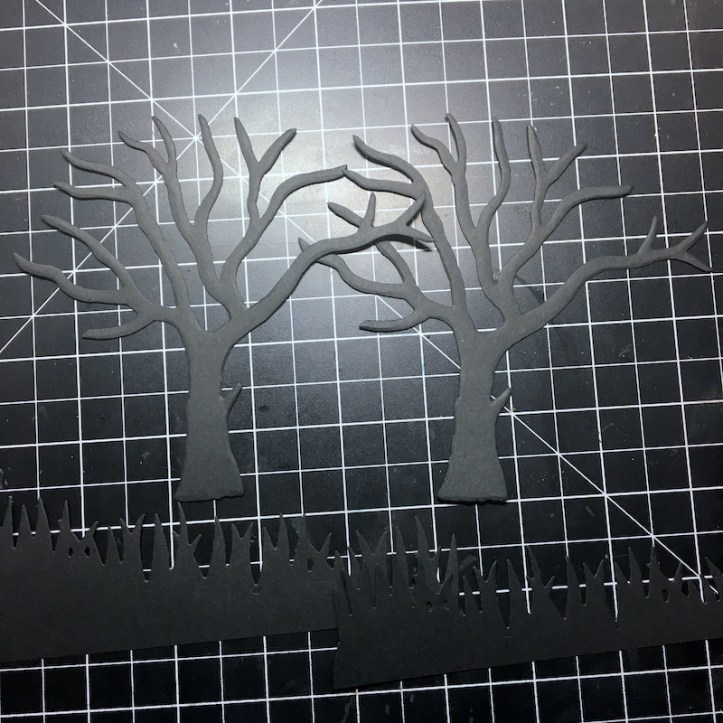 Step One: Die cut two trees and two patches of grass from the Tree die set using Rich Black Soft Finish Cardstock.
 Step Two: Trim two piece of 90lb White Soft Finish Cardstock to 5×5 inches.
Step Three: Using Distress Oxides, create a ombre sunset background on one of the piece of cardstock. I used Dried Marigold, Spiced Marmalade, Rusty Hinge, Fired Brick and Aged Mahogany to create this back drop. Sprayed the bottom forth of the paper with clean water to create a water effect. I added a little Black Soot Distress Oxide to the bottom corners of the cardstock to help the water effect look more realistic.
 Step Four: Trim the bottom of one of the piece of grass die cut so it curves and looks like the edge of a body of water.
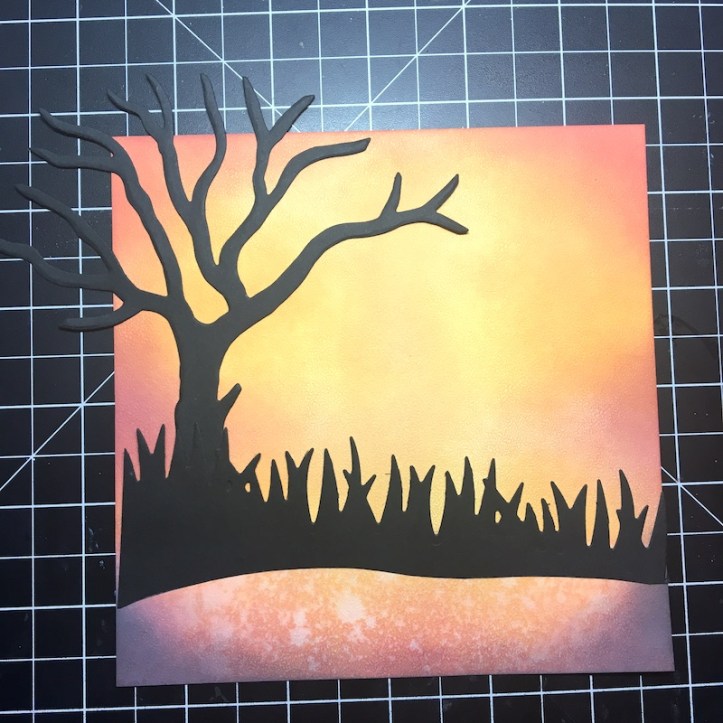 Step Five: Using Kids Choice Glue, adhere the tree silhouette and grass silhouette to the card. Trim the bits that hang over the cardstock.
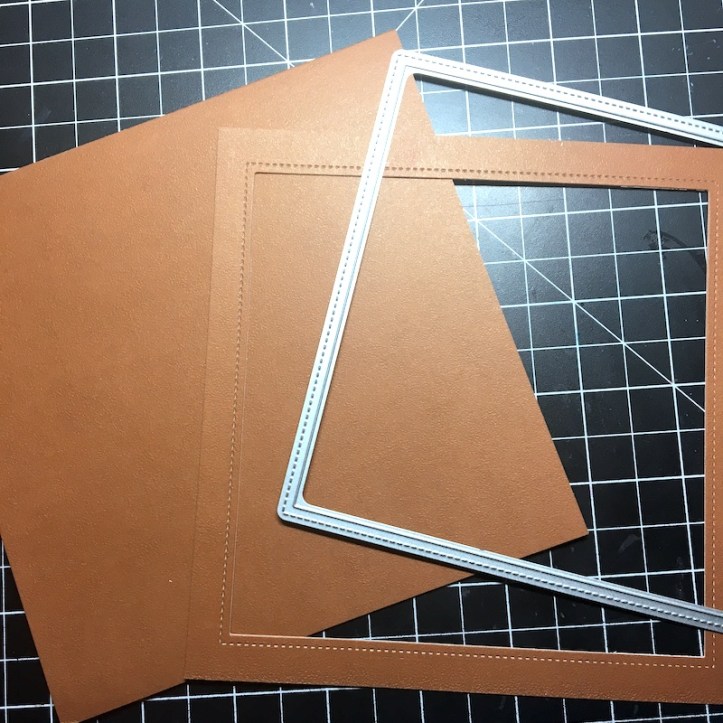 Step Six: Trim a piece of Rust Soft Finish Cardstock to 12×6 inches and score and fold at the 6 inch mark to create a 6×6 card frame. Trim another piece of 6×6 inches rust cardstock and die cut it with the largest Frame It/Stitched Square die.
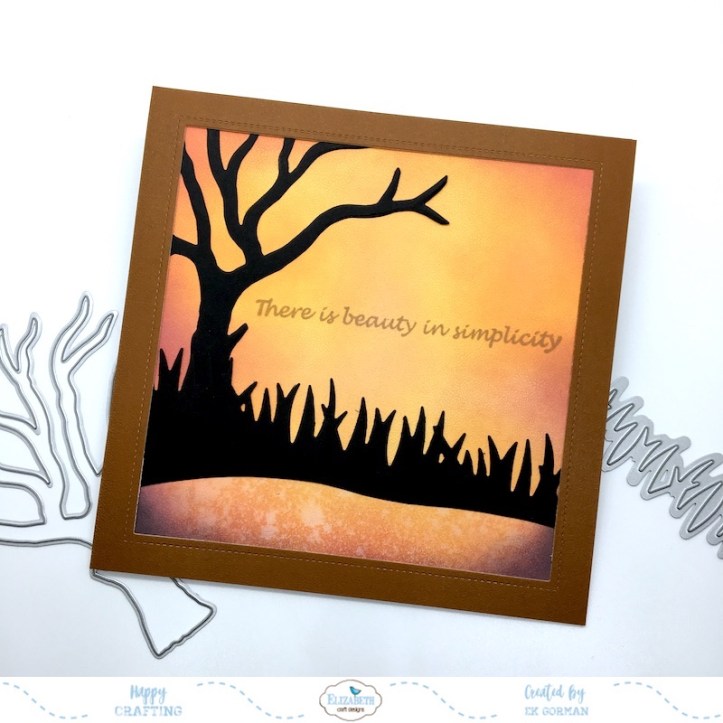 Step Seven: Adhere the sunset to the card frame using 10mm Clear Double Sided Adhesive and the rust frame over the sunset with 6mm Clear Double Sided Adhesive.
 Step Eight: Stamp the sentiment from the Little Words that Mean a Lot stamp set in brown ink. I used Archival Tree Branch.
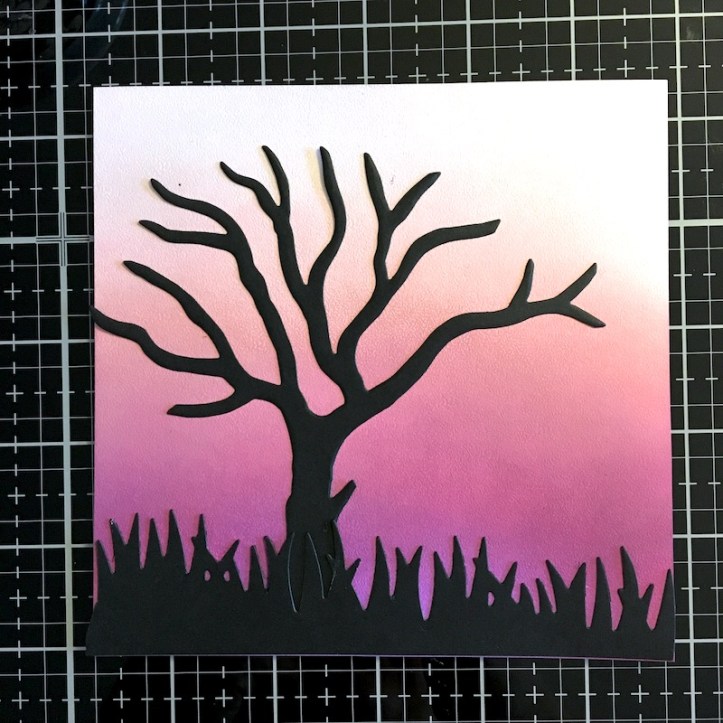 Step Nine: Repeat step three on the second piece of 5×5 white cardstock. This time use Distress Oxides in purple tones. I used Milled Lavender, Victorian Velvet, Seedless Preserves, and Wilt Violet. Adhere the tree and the grass silhouette to the bottom of the page using the kids choice glue.
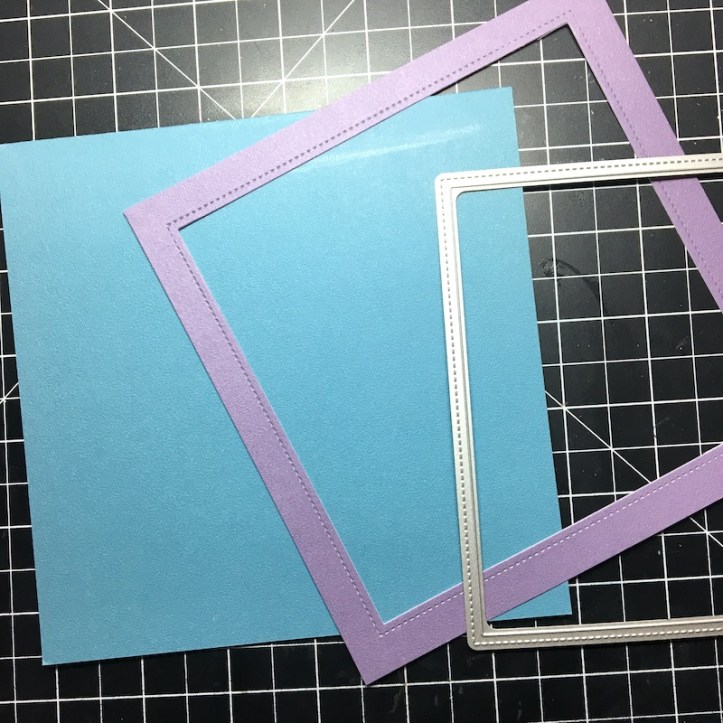 Step Ten: Trim a piece of Dusky Sky Soft Finish Cardstock to 12×6 inches and score and fold at the 6 inch mark to make a 6×6 card frame. Trim a piece of Perfect Purple Soft Finish Cardstock to 6×6 inches and die cut with the largest Frame It/Stitched Square die.
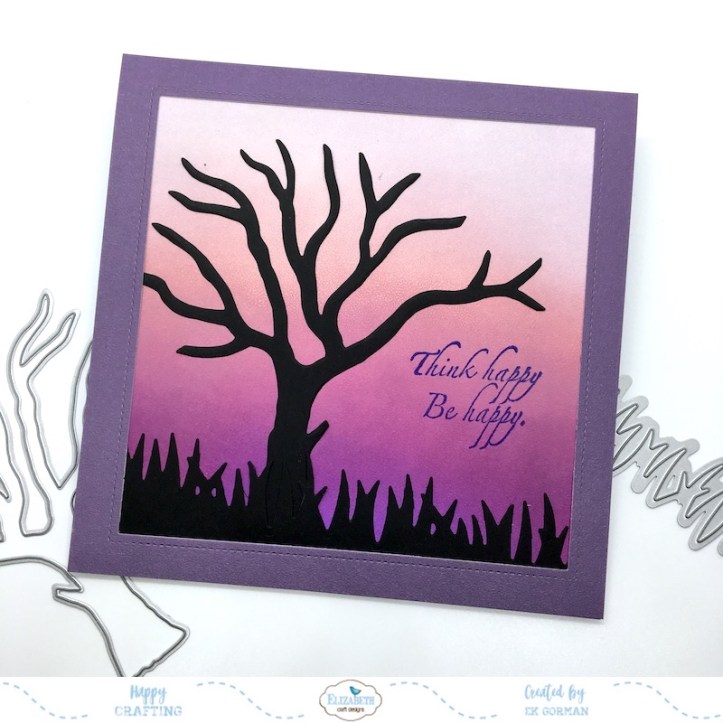 Step Eleven: Adhere the purple sunset to the card frame using 10mm Clear Double Sided Adhesive. Add the purple frame over the sunset using 6mm Clear Double Sided Adhesive.
 Step Twelve: Add the sentiment from the Little Words Mean a Lot stamp set in purple ink. I used ScrapBerry Stains in Purple.
Thanks for peeking in today. Make sure you pop over to Elizabeth Craft Designs to see the entire new release! Until then, Happy Crafting.

